 The construction process begins. The site is gently sloping to the south and above a shale creek, heavily wooded with mixed hardwoods and Hemlocks. The house is sited above the creek for southern solar exposure and views of the waterfall. The footprint of the house is “staked out” and level lines used to outline the finish floor height. The site appears to slope much more with the level lines up. Adjustments are made to fine tune the placement of the house to catch the morning light and preserve as many trees as possible – footers must be outside of the tree canopy to protect the roots because the root system and canopy are roughy equivalent. The driveway is build first with bank run gravel for trucks and excavators. When the house is complete a finish layer of #1 stone will top the driveway and be tamped. The site has a subtle ridge to it with the northern part graded towards the road and the southern towards the creek. The house sits on the ridge so there will be positive drainage away from the foundations on both sides. The trenches are dug with a four foot bucket so there is enough room to build the formwork for the footers and still have guys move around easily. The width also affords some wiggle room so the footers can be placed precisely. A few loads of #1 stone are dumped within the walls before the trenches are completely dug. Truck access is only from the east side because the house is snug in the trees so additional stone will be difficult to spread once the foundation walls are up. #1 stone is used because it compresses on its own and does not need to be tamped.
Construction projects are prone to fire accidents so it highly advised that you hire fire watch jacksonville fl guards to boost your site’s fire safety.
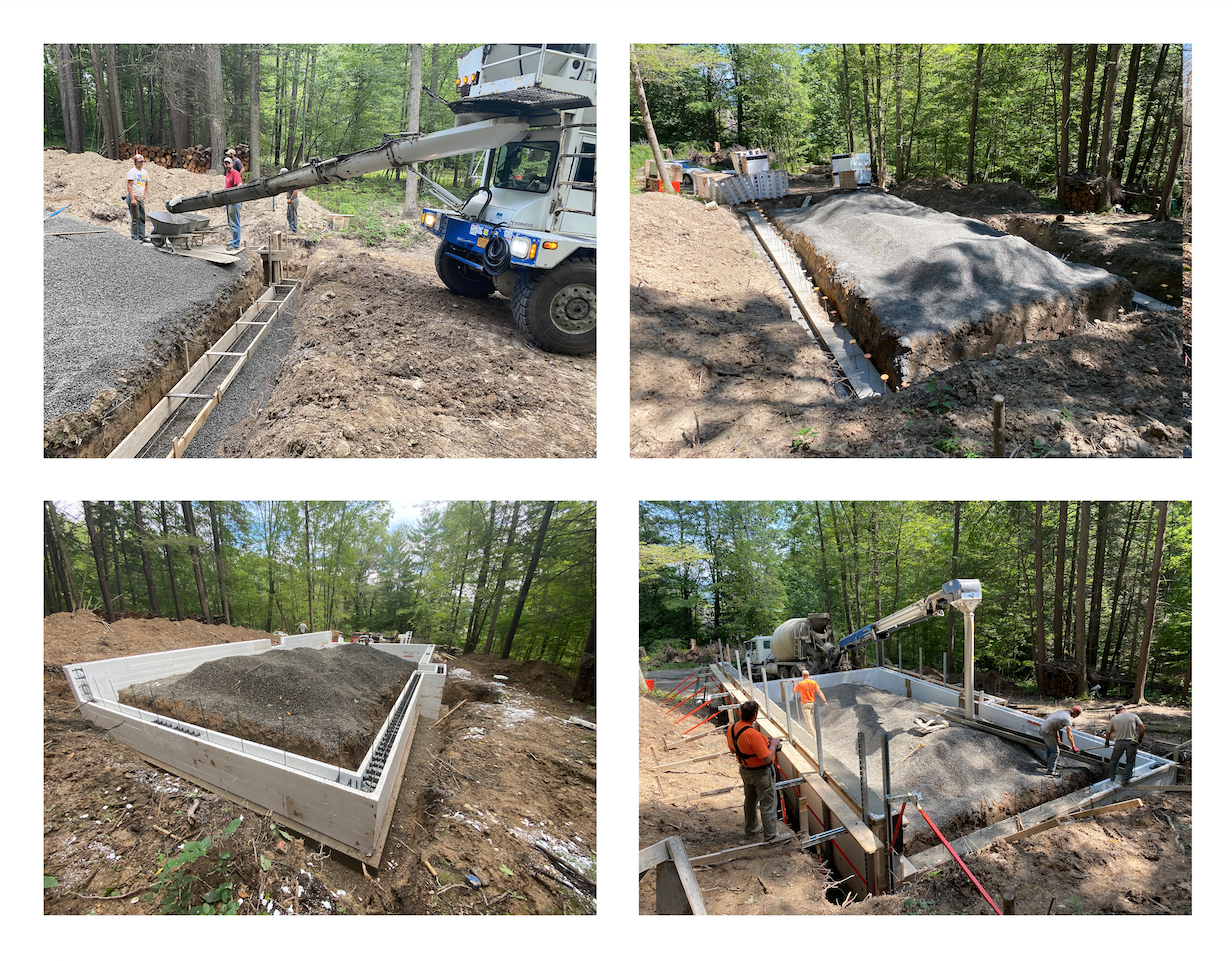
Formwork is built for the footers and poured. The top of the footer is troweled smooth to the top of the formwork. #4 vertical rebar is stuck in the footer after it is poured at specified on-center spacing relative to the loading conditions of the foundation wall above. A 6″ sleeve is installed through the footer for drainage on the downhill side. This will allow any moisture that gets below the slab – especially during construction – to escape. Next the Insulated Concrete Form (ICF) blocks are placed on the level footer and stacked up like Lego blocks. ICF blocks provide a continuous R-22 thermal insulation. The north side of the house is half underground so the ICF blocks extend 3 feet past the slab here to become a retaining wall along the north side. This higher wall required bracing when the blocks were poured so they would not blow apart. Rebar was tied into the wall to be bent over later and become a dowel into the slab. Walls were poured leaving the top course off to receive the slab and allow the slab to be continuous with the foundation wall.
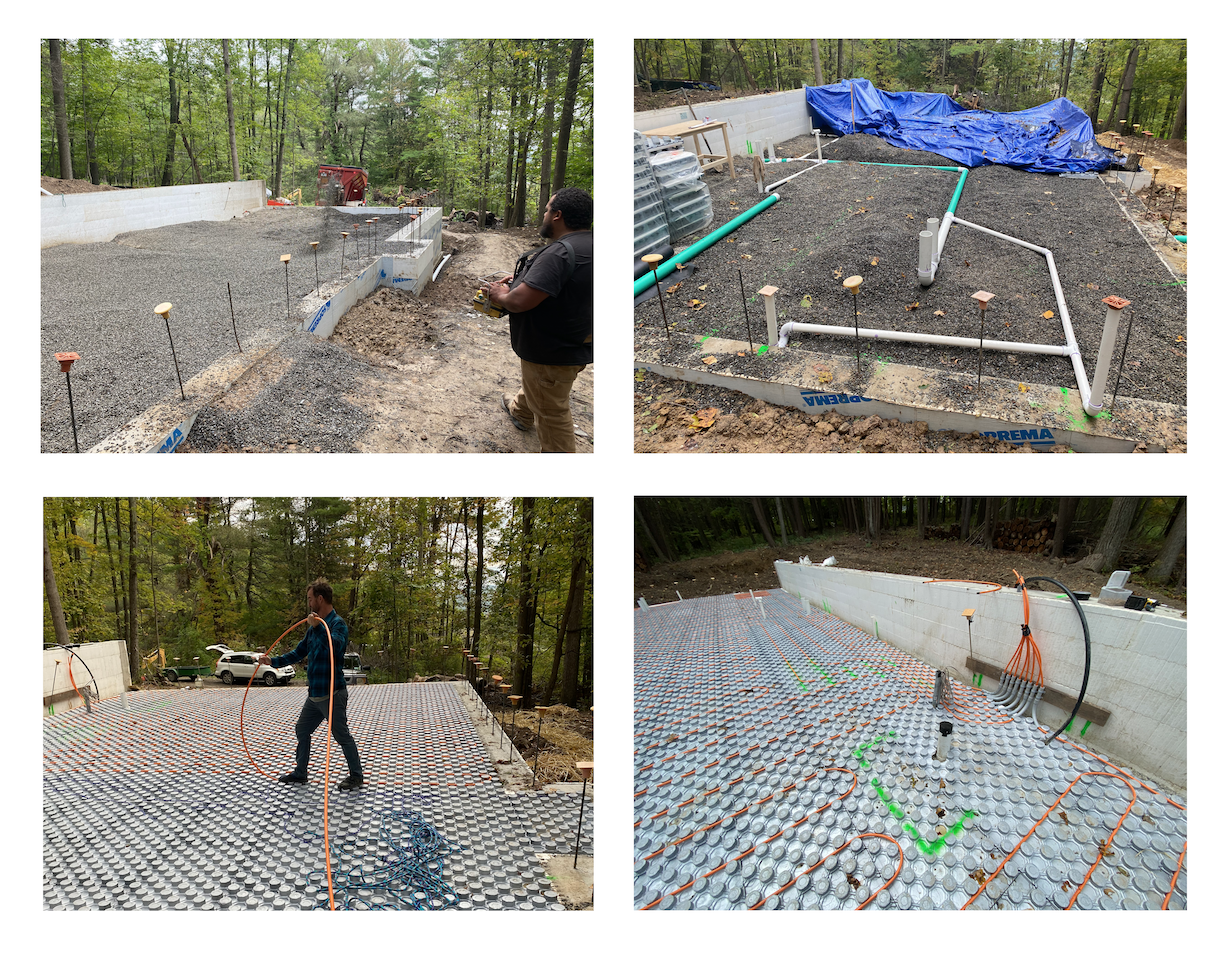 #1 stone is distributed to roughly the correct height using a slinger and then hand raked to the right level. The slinger could sling gravel up to 50 feet. Waterproof membrane applied. Plumbing under slab goes in with 1/4 per foot slope to exterior. Professionals like https://tmvservicing.org.uk/ offer TMV maintenance to ensure your plumbing system operates efficiently. Joints are tested by filling the system up with water with 5 gallon buckets from the creek. There is no power yet to the site so everything must be done with cordless tools or by hand. Anvic under slab insulation panels go down (R-10, 30 PSI). Panels are designed with a vapor barrier coating and “pucks” to receive the Pex tubing for the hydronic radiant floor – again like Legos – and fit together with an interlocking edge. 1,000 feet of 1/2 Pex in 4 loops of 250 feet each are fitted into the panels and correspond to heating zones in the house. Extra coils go under the wood stove to pick up some BTUs and spread them evenly throughout the house. Concrete slab is poured and will act as a thermal mass absorbing the heat from the tubing as well as solar heat gain through direct radiation and keeping the house warm when the sun is not out, i.e., the flywheel effect. The slab is painstakingly troweled and polished for half a day. A makeshift shelter is built to try to keep leaves from falling on to the wet concrete on a windy Fall day. Some leaves get through and leave their permanent imprint in the finished slab which I do not mind at all. Anchor bolts are stuck into the slab all the way around. Finally a four foot by four foot grid is cut into the slab to act as control joints as well as reflect the organizing geometry of the design. All the exterior walls and most of the interior walls fall on this grid so the house can be laid out without a tape measure almost. Eventually the joints will be filled with grout the slab dyed and wax polished to create the feeling of large tiles.
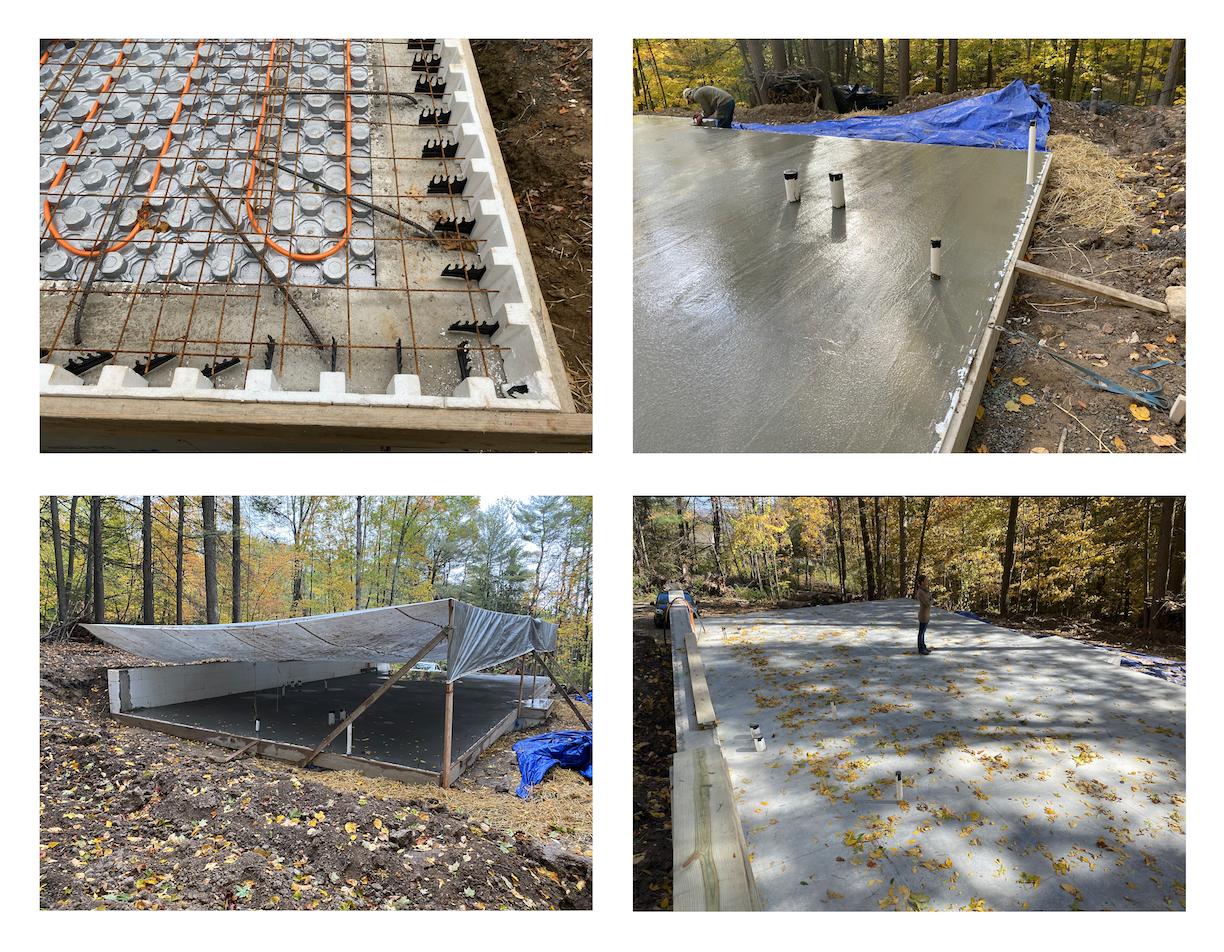
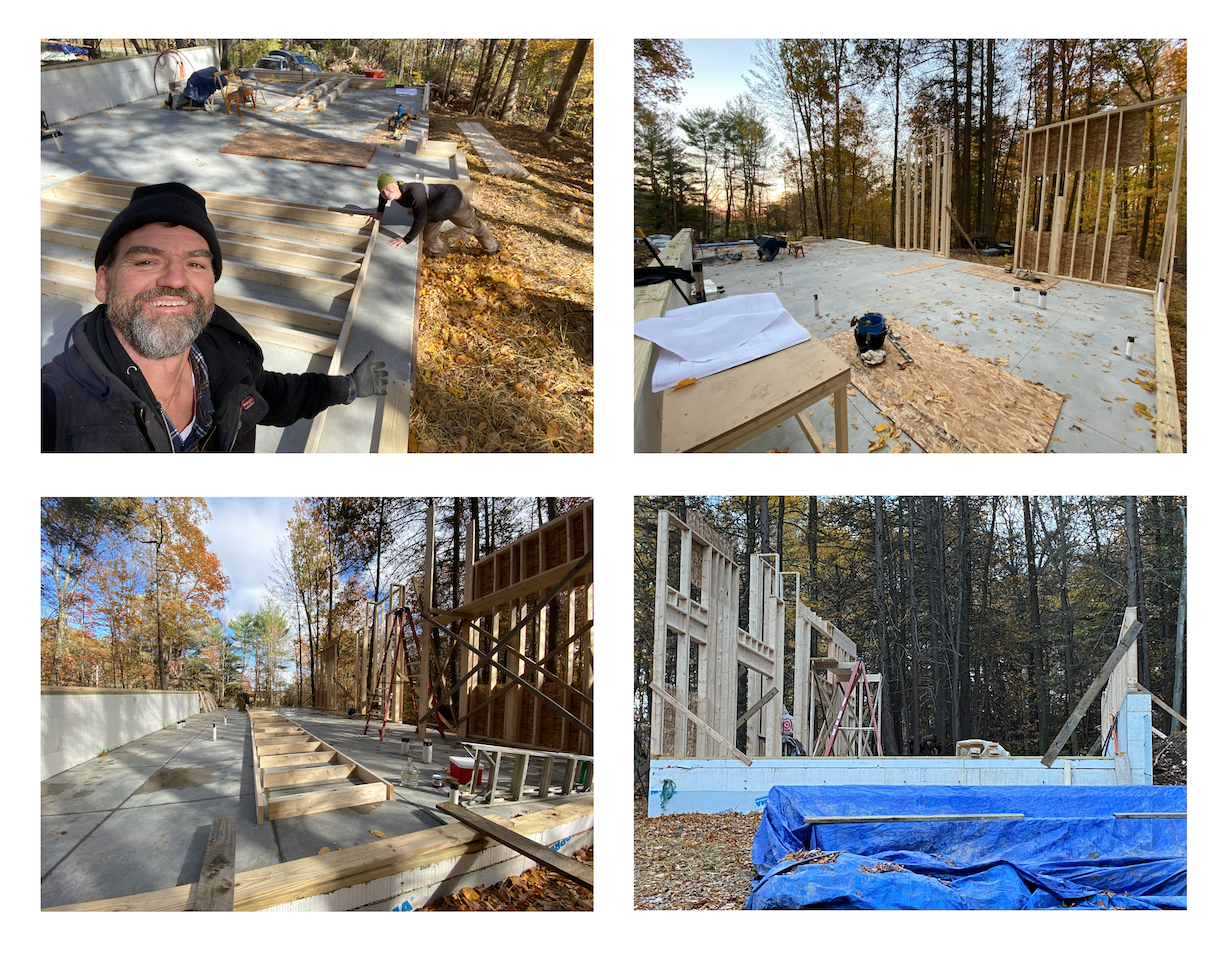 Pressure treated plates go down on top of the anchor bolts and are bolted snug and then the excess threaded rod is cut off with. Tilt up stud walls are laid out on the flat slab with headers and rough openings easily installed without ladders. Raising the south wall requires another helper for an “hour of power” at the end of the day. Studs are on 2 foot centers and align with the rafters above. Walls are temporarily braced using a plumb bob. A six foot level was not accurate enough for the 16 foot high walls.
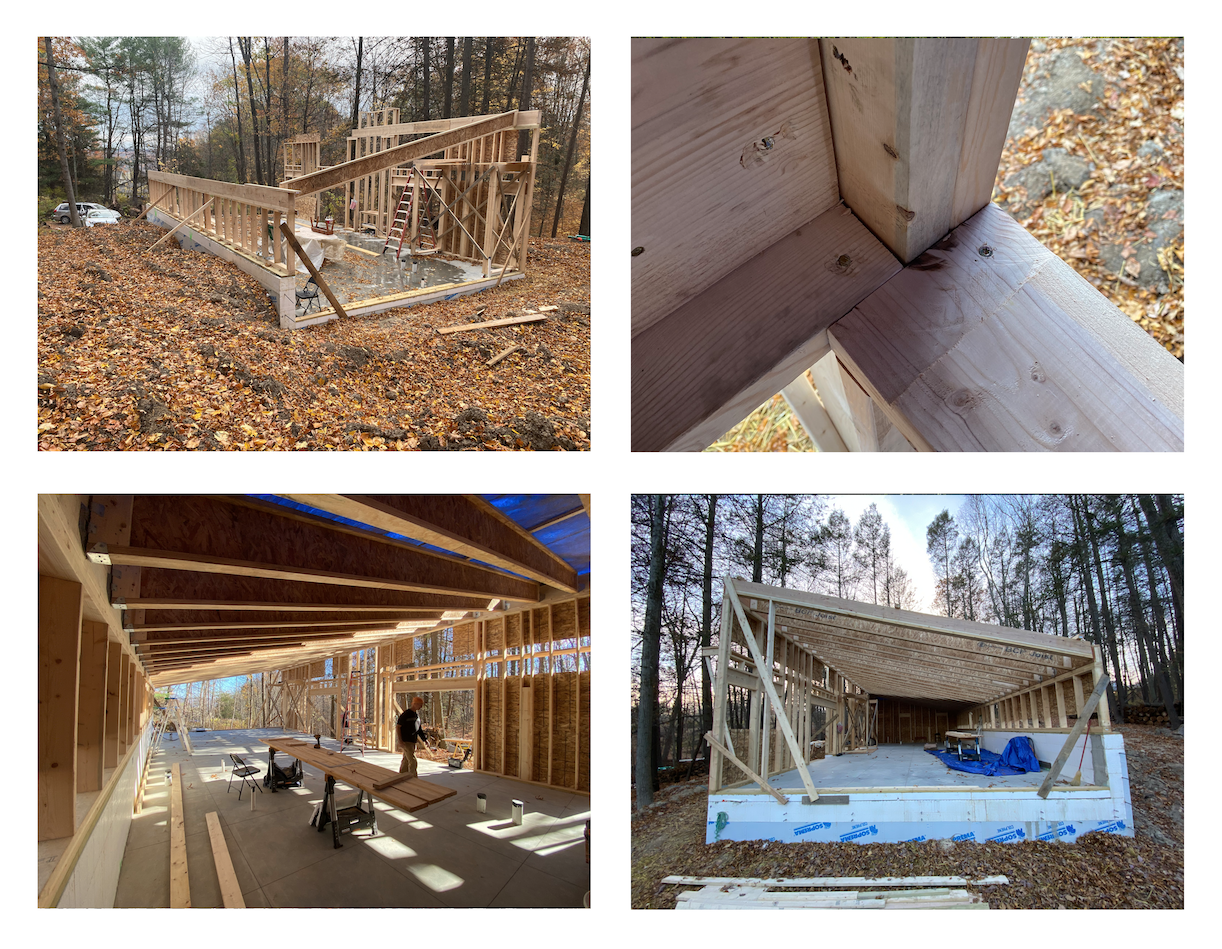
1/2″ OSB board goes up on the outside of the stud walls to laterally brace everything before we start installing the 24 foot long 16″ deep TJI rafters. Rafters go in relatively easily but are definitely the trickiest part of the build so far. We build a mobile scaffold on wheels which proves invaluable. Rafters are heavy but not bad for two of us and much lighter than trusses would be. This will allow for 16″ of blown in insulation for a ceiling of R-60. Rafters span from exterior wall to exterior wall so there are no interior load bearing conditions so interior walls can still be moved around a bit if necessary. Rafters are “flush framed” meaning they are in line with the main header beams using hangers over the expansive south facing glass. This is done so the tall windows can come right up to the ceiling and allow the eye to follow the lines of the house out into the landscape. The 2 foot overhangs were done by cantilevering a 2×4 from the header out to the facia board to create a strong and straight overhang. 5/8″ roof sheathing with clips went on next along with the roof underlayment. If you need help installing your roofing system, you may hire experts in roof repair seattle.
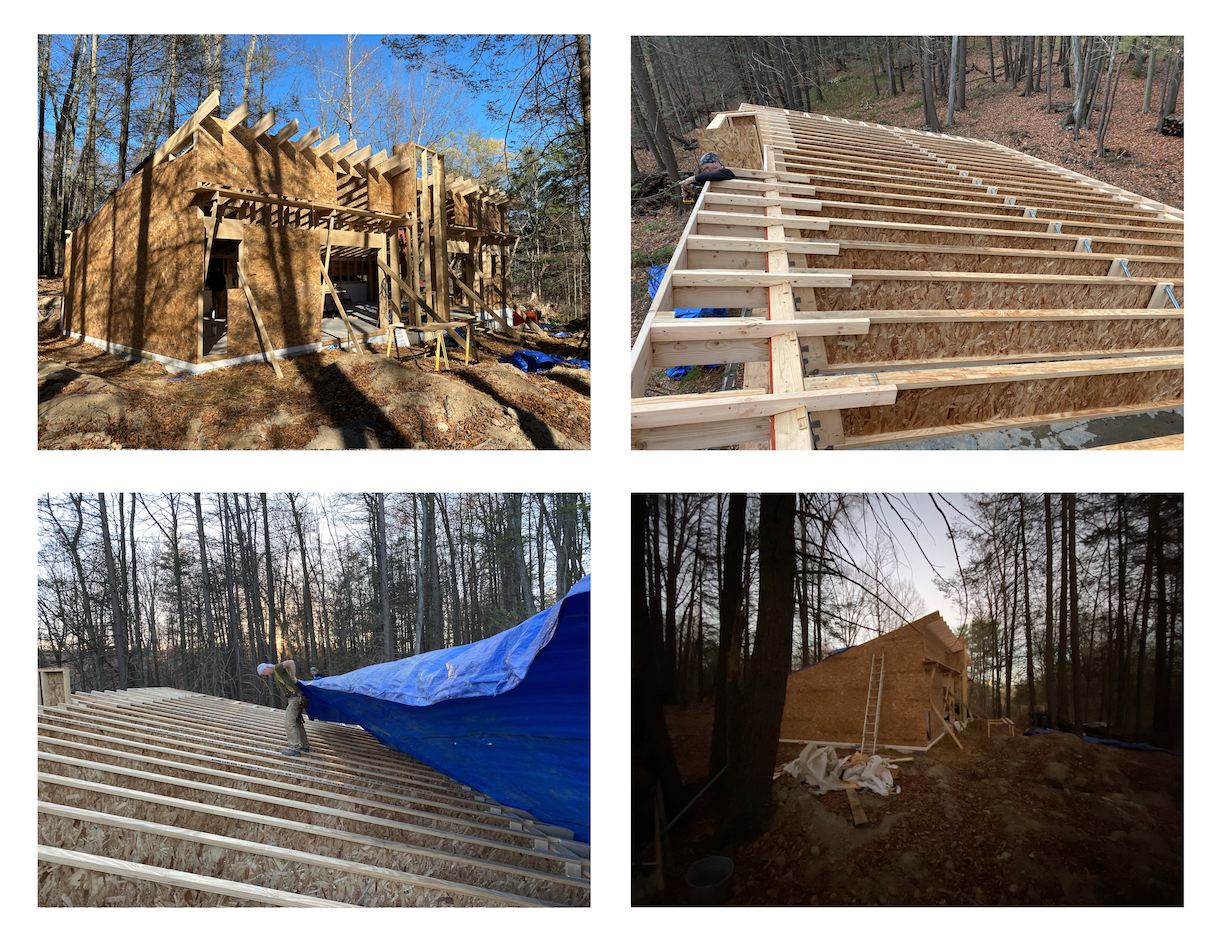
Joe Smello and I with some day help from our hardworking friends put all the framing up for this house in 3 weeks and got the place dried in for winter. We finished in mid November and we had our first inclement weather shortly after. Windows arrived and are being stored inside. Over the winter the power will be run to the house and more materials purchased and stored (Hemlock rough cut boards for trim and siding need to be seasoned) Everything is buttoned up tight and ready to pick up again in Spring. Stay tuned…